How to Change Apple ID or iCloud Email
By SendBridge Team · Published Sep 16, 2025 · 5 min read · Tutorials

Have you ever thought about changing your Apple ID or iCloud email address? It might sound like a big step, but there are several reasons why you might want to do it. Maybe you're using an email address you no longer have access to, or you've created a new email that better reflects your identity.
Whatever the reason, changing your Apple ID or iCloud email is a straightforward process. In this article, we'll guide you through why you might need to make this change and how to do it step by step.
Why Change Your Apple ID or iCloud Email?
- Access Issues: If you've lost access to the email account associated with your Apple ID or iCloud, it's a good idea to update it to the one you currently use.
- Personal or Professional Needs: Your old email might not suit your current personal or professional identity. Changing to a more appropriate email can help.
- Security Concerns: In case of a security breach or if your email has been compromised, changing your Apple ID or iCloud email can add an extra layer of protection.
- Simplifying Accounts: You might want to streamline your accounts by using a single email for everything, making it easier to manage.
How to Change Your Apple ID?
Before You Start - Make sure your new email address is not already associated with another Apple ID.
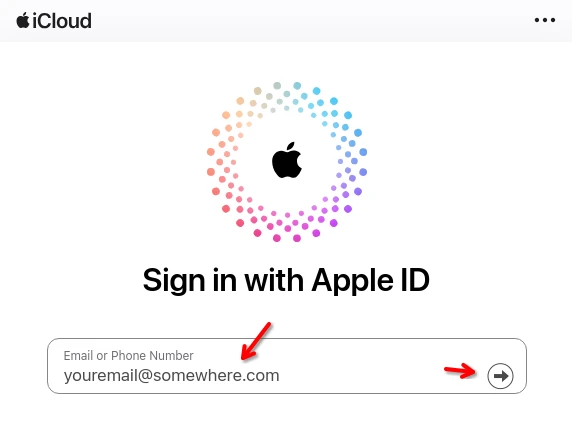
1) Login on iCloud.com
Enter your email address and click on the black arrow on the right side.
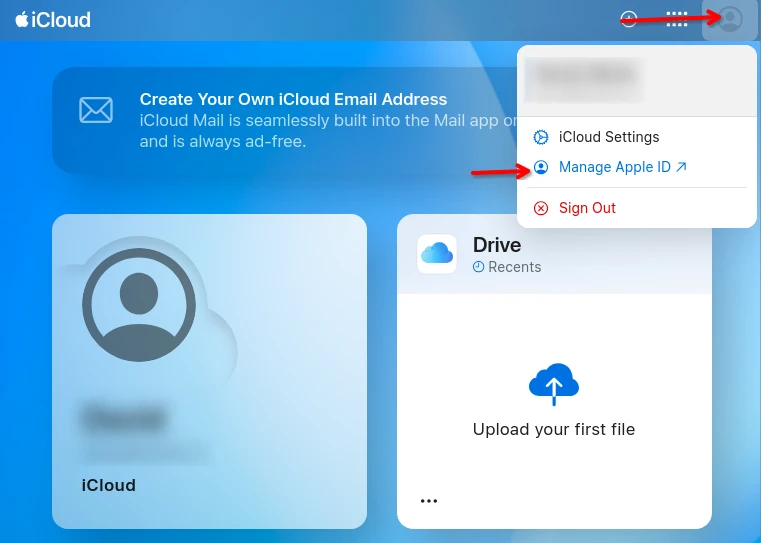
2) Go to the Account
Click on the account icon in the top right corner and select Manage Apple-ID.
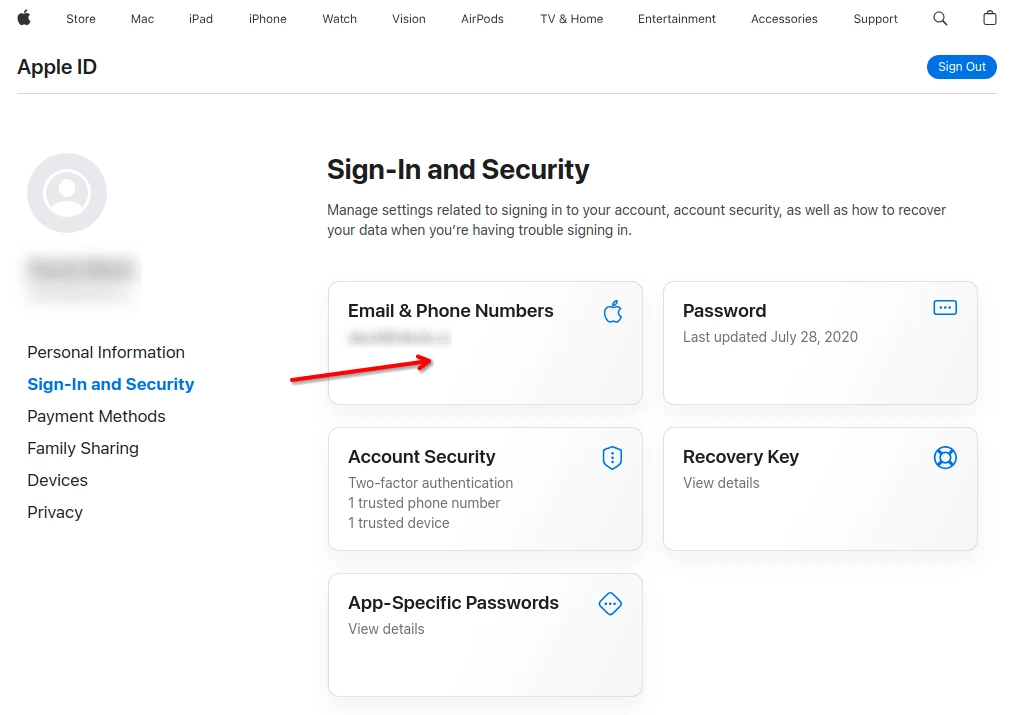
3) Apple ID Account Management
A new window with Apple account details will pop up. Click on Email & Phone Numbers.
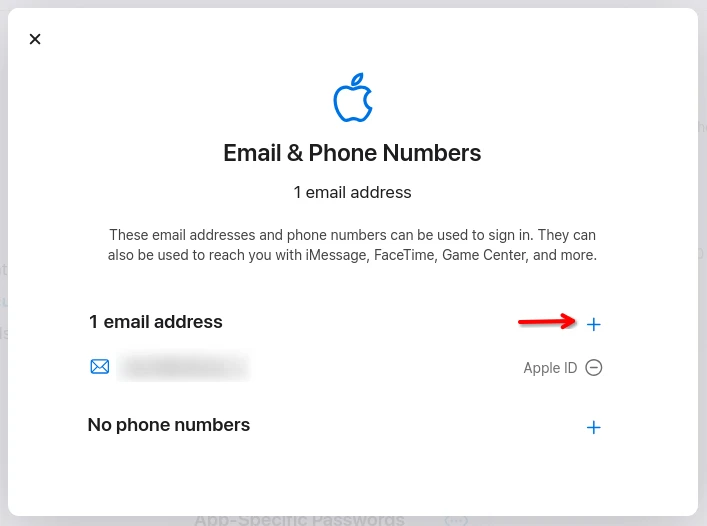
4) Add a New Email
Click on the plus (+) icon on the right side.
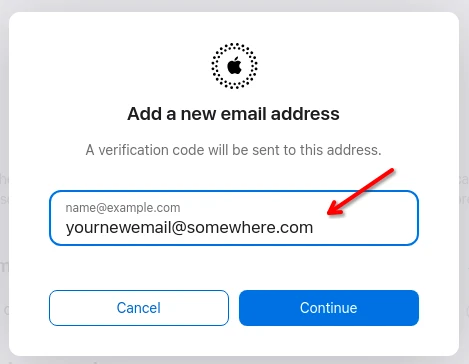
A new pop-up window will appear. Fill in your new email address and click on "Continue".
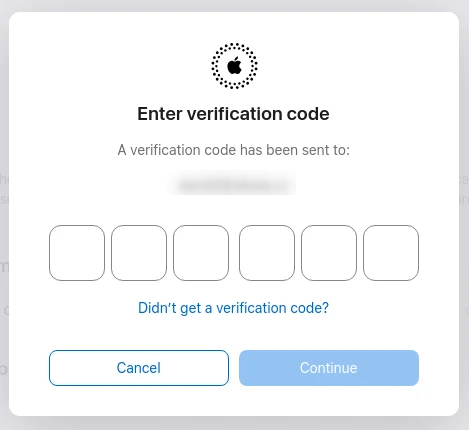
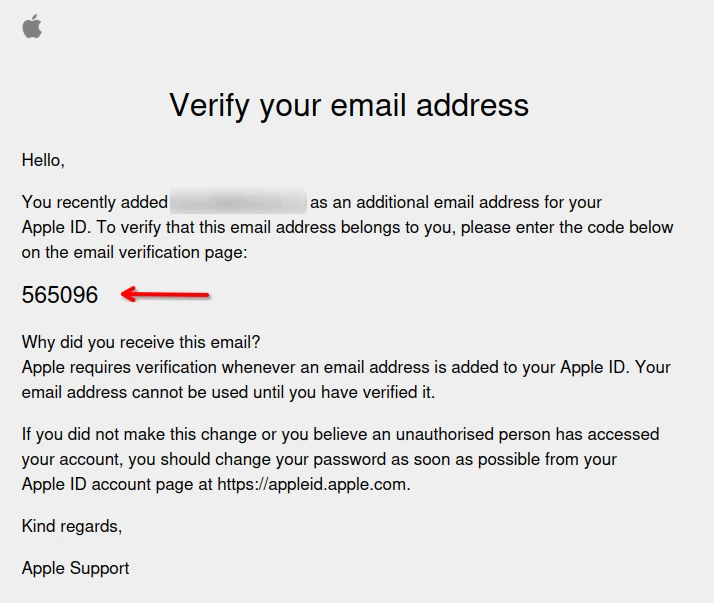
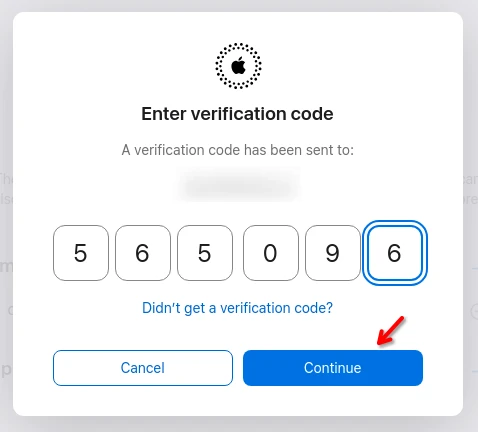
5) Confirm Email Change
Apple will send you an email with a 6-digit verification code. Write the code in the empty fields.
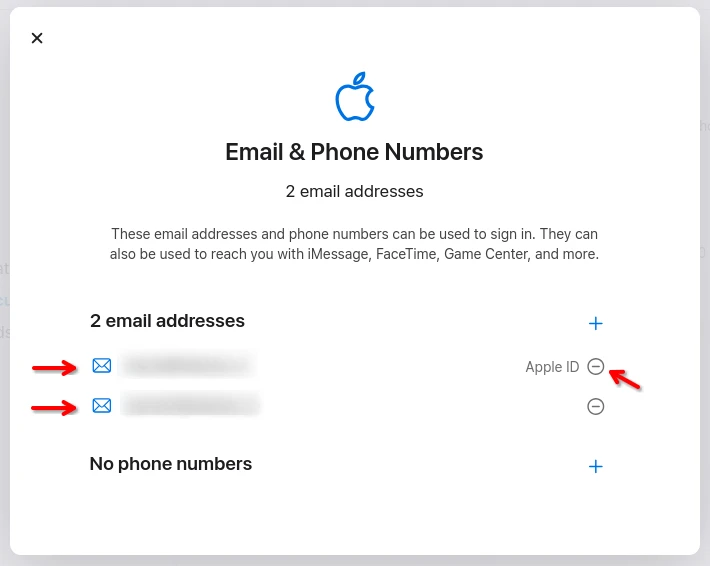
6) Email Change or Removal (Optional)
If everything went well you should see two email addresses listed in your account. The original one still has an Apple ID tag on the right side. If you want to switch your Apple ID to your newly added email address click on the minus (-) icon.
7) Switch Apple ID (Optional)
Fill in your newly confirmed email as your new Apple ID.
On an iPhone, iPad, or iPod touch:
- Open Settings: Go to the Settings app and tap on your name at the top.
- Go to Name, Phone Numbers, Email: Tap on this option, then tap on "Edit" next to "Reachable At."
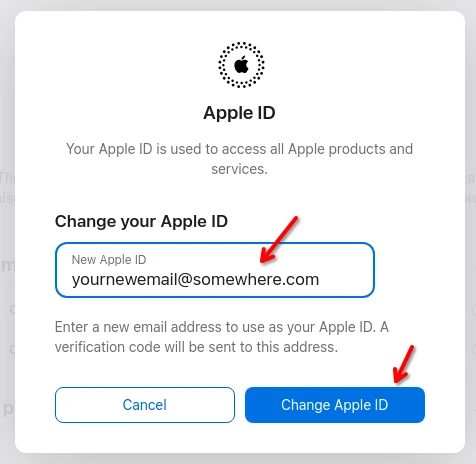
- Change Your Apple ID: Tap on "Change Apple ID," enter the new email you wish to use, and then tap "Next."
- Verify: Check your new email for a verification code from Apple. Enter this code to confirm the change.
On a Mac:
- System Preferences: Click on the Apple menu, select "System Preferences," and then click on "Apple ID."
- Edit: Click on "Name, Phone Numbers, Email," then click on "Edit" next to "Reachable At."
- Update Email: Enter the new email address you want to use for your Apple ID and click "Continue."
- Verify: Look for a verification email from Apple in your new inbox. Use the code provided to complete the process.
Creating a New iCloud Email
If you want to create a new @icloud.com email, you can do so on your iPhone, iPad, or iPod touch by going to Settings, tapping on your name, iCloud, and then "Mail." If you don't have an iCloud email, you can create a new one by following the prompts.
Important Tips
- Backup: Before making changes, ensure you have a backup of your important data.
- Sign Out: Remember to sign out of all devices before changing your Apple ID or iCloud email to avoid syncing issues.
- Update Everywhere: After changing your email, update your Apple ID on all your devices and in any third-party apps that use it. While you're preparing your device for this switch, it's also a great opportunity to free up some space by clearing out unnecessary files, ensuring a smooth transition.
Changing your Apple ID or iCloud email can give you a fresh start with your Apple devices and services. Whether it's for security reasons, access issues, or a need for a more appropriate email address, the process is designed to be user-friendly. By following the steps outlined above, you can make the change with ease and continue enjoying your Apple ecosystem without interruption.