How to Translate Email Attachment - The Easy Way
By SendBridge Team · Published Jun 21, 2026 · 5 min read · Tutorials

Sometimes you receive important emails with an attachment that is written in a foreign language that you don't understand. Whether the attachment is an image, a PDF file, a Word report, or any other format, translating its content manually is a headache.
But today, the manual translation process is not the sole option to do the job. Now, you can use online image translator tools to automatically translate the images into the desired language. It is the easiest way for you. However, you might not know the complete procedure for translating any attachment with such a tool.
In this blog, we are going to explain the easiest way of translating your attachments using an online image translation tool. We have divided the whole method into steps to make it easier to follow.
Easier Way to Translate Your Email Attachments: Explained Step by Step
1st Step: Save the Email Attachment
The first and foremost step of the process is to download the email attachment to your device. To do this, you need to;
- Visit the email inbox area.
- Find the email that contains the attachment.
- Click on the attachment, and it will open, then find the Download button there and press it.
- Your attachment will be saved to your device.
2nd Step: Convert Your Attachment Into Image Format
As we stated earlier, image translator tools translate images only. So, if your email attachment is a picture or a screenshot, then it's well and good. You can skip this step and move to the next.
But if the attachment comes in a PDF, Word, or PowerPoint file, then you first need to convert it into an image format.
Below, we discussed how to do this conversion:
- You can use the PDF to Image converter to transform each page of a PDF file into an image.
- To convert a MS Word file into images, you can use a Word to Image converter.
- For PowerPoints, you can export each of their slides directly into a picture. Just click the File, select Save As, and choose the Image option.
3rd Step: Choose a Reliable Image Translator Tool
The third step involves finding a reliable image translator tool. It is the most important step. Several tools on the market allow users to translate pictures. All of them claim to be accurate and the best, but they don't function equally. In such a condition, picking the right one can seem challenging to you.
To help you get out of this, we have provided the main features that are must-haves for a valuable image translator. You need to check these features and choose the tool based on them.
- A tool should be quick so that you can get results faster.
- It must be easier to use for anyone. All of its usage steps should be clear to understand.
- The most important feature to look for in the tool is accurate working. The tool should not lose the overall quality of your image.
- Look for the tool that comes up with a wide range of input and output languages.
To make this step further easier for you, we also conducted research, we checked several online image translators, and in the end, we found OCR.best. It offers all the afore-mentioned features. In the next steps, we are going to use this image translation tool practically.
4th Step: Input the Image of the Email Attachment
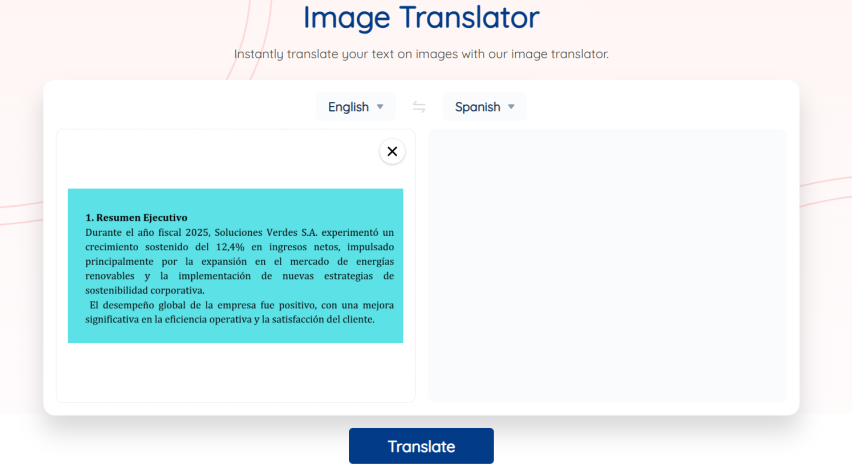
When you have selected a photo translator, it is time to input the image of your email attachment into the tool. For this, you just need to follow these steps;
- Open the OCR.best's image translator on your device.
- Upload, paste, or drag & drop the email attachment's image into the tool.
For demonstration, we uploaded an image into the tool.
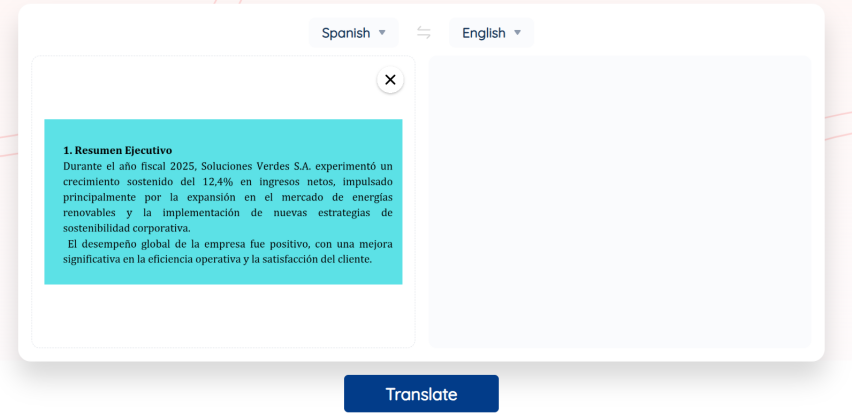
5th Step: Choose the Input and Output Language
Once you have input the image, you need to select the input and the output language (in which you need the attachment's image to be translated). For choosing languages, simply press the input language option, and a list of available languages will be shown. There, you can choose the actual language of the email attachment. Similarly, select the output language.
Here's the image as the demo of the 5th step.
6th Step: Begin Translation and Review the Output
Now, the final step comes that involves running the tool and checking the accuracy of the results. To run the tool, you need to simply hit the "Translate" button. The image translator will take no time to translate the image of your email attachment into the desired language. And you'll get the translated image in the output box.
Here's the demo of the translated image.
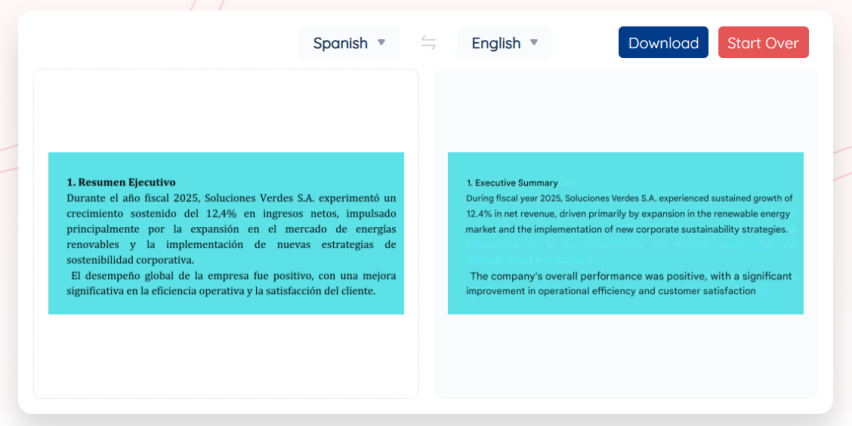
After image translation, you should check the output image to ensure accuracy. Then, you can click the download button to save the translated image of the email attachment.
Conclusion
Gone are the days when email attachment translation used to take a lot of time and effort. However, image translation tools have made the process quick and easier. In this blog, we explained how to translate email attachments using the OCR.best image translator. We used a step-by-step approach. You can follow these steps to translate the images of your email attachments and understand them easily.